# Internal/External Registration Flow
Let's take a look at the registration flow in EventRaptor.
This can look confusing at first, so let's break it down into the different parts.

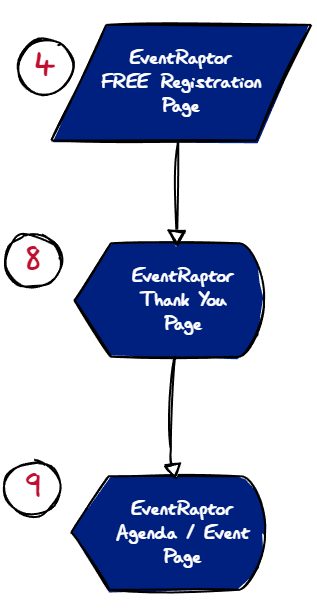
If you have not up any external pages at all, the EventRaptor will simply display the Free Registration page (Step 4), then the Thank You page (Step 8), and the Agenda / Event page (Step 9).
You can, however, customize any part of this journey.
1. This first box is called a "decision diamond". We check if you have set an external registration page in your **Setup / Registration Page** for the event, or not. If you have, go to Step 2. If not, go to Step 4.
2. In step 2 you can use [CRMRaptor](https://crmraptor.com/) or your own registration page. This can be one of many types:\
\- A free registration\
\- A free registration with a paid upgrade\
\- A paid registration\
\- You can add an order bump, or a OTO (One Time Offer).\
\- Essentially, you are 100% in control.\
Continue to Step 3, or send registrants directly to Step 8 (Thank You page)
3. Display your own thank you page. We recommend you link to the Agenda/Event page (Step 9) as well.
4. You only come to Step 4 if you choose to use the EventRaptor registration page, which is a FREE registration. Continue to Step 5.
5. After registration, we check if you have set a **Redirect after Registration** link in **Setup / Registration Page**. If yes, go to Step 6; otherwise go to Step 8.
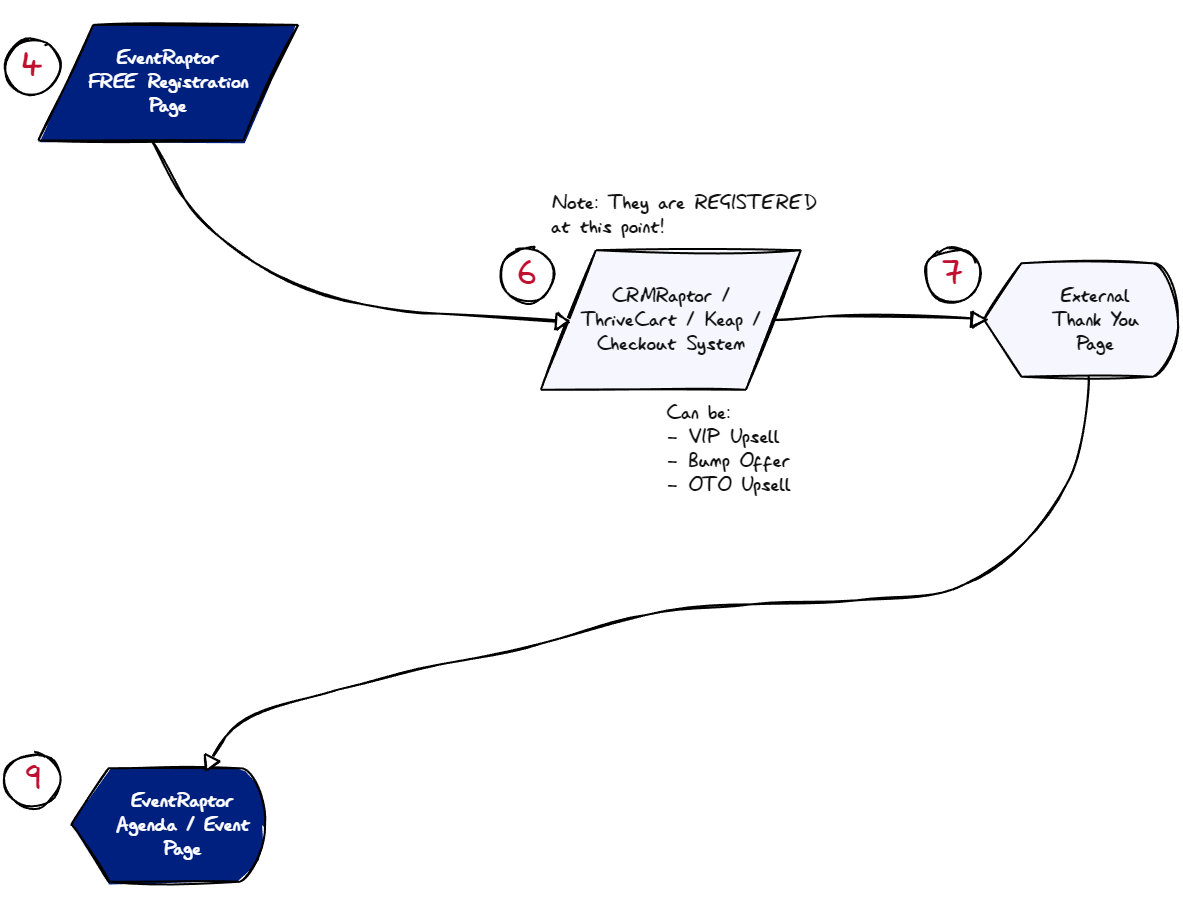
6. Display your own checkout page; this can be CRMRaptor or your own checkout system like ThriveCart, Keap, or any other. Anyone we send to this page is already registered. You are only limited by the options of your own checkout cart. We recommend including a link to the EventRaptor Thank You page (Step 8) or Agenda page (Step 9) for those who do not wish to upgrade. For those who buy, send them to the EventRaptor Thank You page (Step 8), the Agenda page (Step 9), or show your own Thank You page (Step 7).
7. Display your own Thank You page; we recommend you link to the Agenda page (Step 9).
8. The EventRaptor Thank You page has links to the Agenda page (Step 9), a QR code so it can be scanned on a phone, and links to different calendar systems.
9. We recommend using the EventRaptor Agenda page as the final step, or you can build your own agenda page.
### FREE Ticket sequence using EventRaptor only
### Freemium (Free + Paid Ticket) In EventRaptor & CRMRaptor
---
# Agent Instructions: Querying This Documentation
If you need additional information that is not directly available in this page, you can query the documentation dynamically by asking a question.
Perform an HTTP GET request on the current page URL with the `ask` query parameter:
```
GET https://eventraptor.gitbook.io/support/general/internal-external-registration-flow.md?ask=
```
The question should be specific, self-contained, and written in natural language.
The response will contain a direct answer to the question and relevant excerpts and sources from the documentation.
Use this mechanism when the answer is not explicitly present in the current page, you need clarification or additional context, or you want to retrieve related documentation sections.